Administration
To simplify the management of computers and users, we have introduced the Administration pages with many useful features. Here, you can have an overview of all computers, computer groups, users, and user groups. Additionally, you can access the Audit to view and filter all the events within Administration pages, and configure settings on the domain level or the user level.
Note: Administration pages can only be accessed by Domain Admin users. The Account Owner is a Domain Admin by default, and you can promote other users to Domain Admin by going to Administration > Users > Select User > Settings > General, and configure setting Domain Admin to "Enable".
Computers
The Computers page displays all remote computers associated with your account, including those registered by users created under your account. It gives you a central location to manage computers, view key information, and organize them into groups for easier access control.
Key Features:
- See All Computers: View all remote computers linked to your account, including those registered by users within your domain.
- Change Group: Move computers between groups to organize them.
- Change Owner: Reassign ownership of a computer to another user.
- Share Computer: Share access to a specific computer with users or user groups in your domain. You can also assign connect-only access to limit permissions.
- Add Tags: Use tags to categorize and filter computers based on your own criteria.
- Computer Details: The table displays columns such as Alias, Computer Name, Status, Last Online, Computer Group, Owner, Shares, Tags, Platform, Agent Version, IP Address, and MAC Address.
- Export to CSV: Exports the same computer data to a CSV file.
Note: If a computer is added to a Computer Group, ownership is automatically transferred to the Group Owner. The group owner can be changed by users with the appropriate permissions (e.g. Group Admin, Computer(s) Manager, or Computer Owner).
Note: For easier management and advanced permission controls (such as setting access levels or automating sharing for newly added computers), we recommend sharing via Computer Groups instead of individual computers.
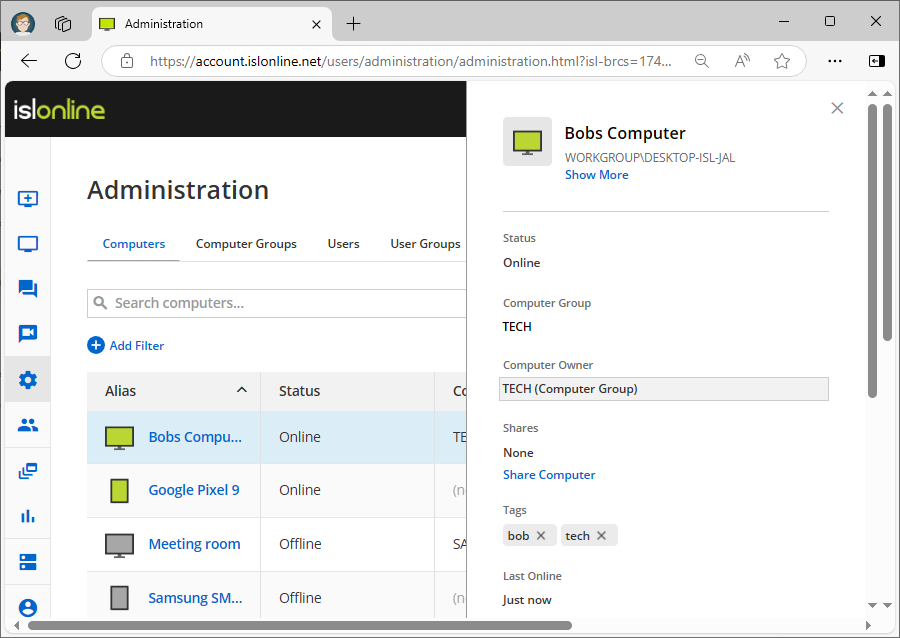
Administration > Computers
The Web Portal > Administration > Computers page allows you to view and manage detailed properties of each computer, but it does not support bulk operations such as changing access passwords, upgrading the ISL AlwaysOn agent, deleting computers, or performing multiple actions at once.
To perform these actions, use the main Computers page (available in both the ISL Light application and the Web Portal > Computers section), which displays all computers you own or those shared with you.
If a computer is not visible or manageable via the Computers interface, you can still access and modify it under Administration > Computers. From there, you can either:
- Change owner to yourself, or
- Share the computer with a Computer Group where you are the Group Owner, or the group is shared with you with Group Admin permissions.
Once these conditions are met, the computers will appear in your Computers dashboard (in both the Web Portal and ISL Light). From there, you’ll be able to perform actions such as connecting to computers, deleting them, changing access passwords, upgrading the ISL AlwaysOn agent, and more.
Computer Groups
The Computer Groups page in ISL Online offers an overview of all the Computer Groups in your account.
Key Features:
- Create Groups: Set up new computer groups to strucutre.
- Add Computers to Groups: Assign one or more computers to a group.
- Assign Group Members: Group members can be individual users or user groups from within your domain. When adding members to a Computer Group, you can assign one of the following permission levels:
- Change Group Owner: The Group Owner is the user who created the computer group. This user has full control over the group.
- Delete Groups: Delete computer groups when they are no longer needed.
Members with this permission can connect to computers within the group, but cannot edit, delete, or manage them in any way.
b.) Computers ManagerInherits all permissions from Connect Only. In addition, members can edit and delete computers, and execute actions (e.g., upgrade agent, change password).
c.) Group AdminInherits all permissions from Computers Manager. Group Admins can also manage access to the group — including adding or removing members and changing their permissions.
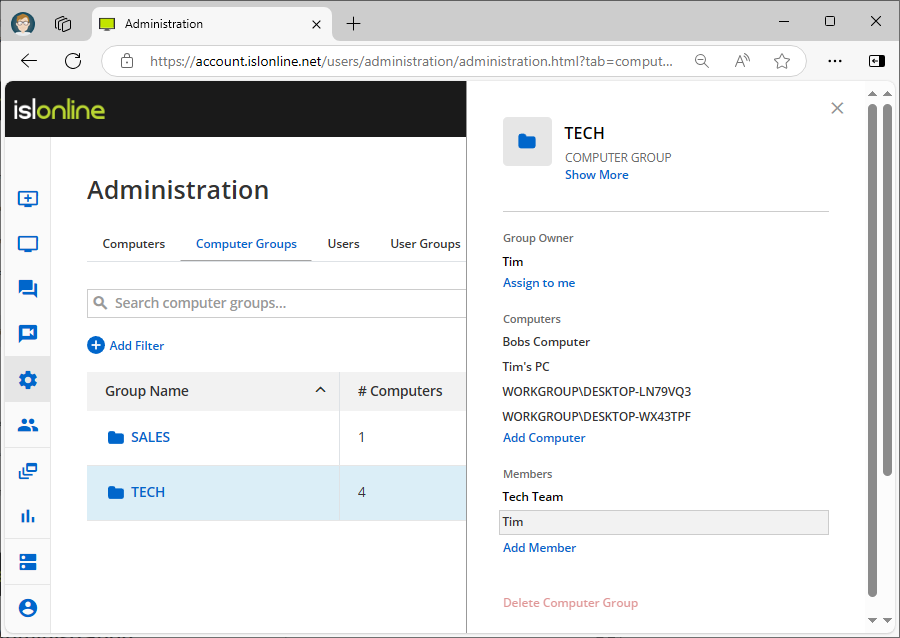
Administration > Computer Groups
Users
The Users page allows you to create new users and assign them ISL Online accounts. You can also manage existing users by editing their full names, email addresses, and changing or resetting their passwords. Additionally, you can set specific permissions for each user, such as assigning the number of licenses or disabling certain features.
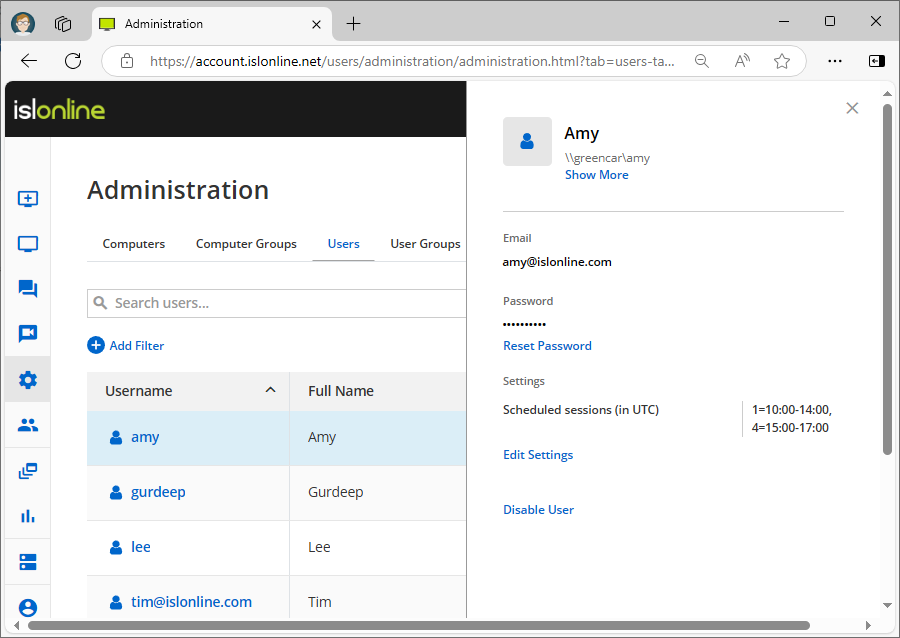
Administration > Users
User Groups
The User Groups page enables you to create groups of users and add them to those groups. The main purpose of User Groups is to group users based on certain characteristics, such as department. By creating a User Group for a department, you can grant access to certain computers or computer groups for the entire department and set their permissions.
For example, you could have a User Group named "Admins" that requires access to multiple computers or computer groups. By sharing the computers or computer groups with the "Admins" User Group, new team members will automatically have access to those resources when they are added to the group. If a user no longer requires access, they can simply be removed from the group.
Read manual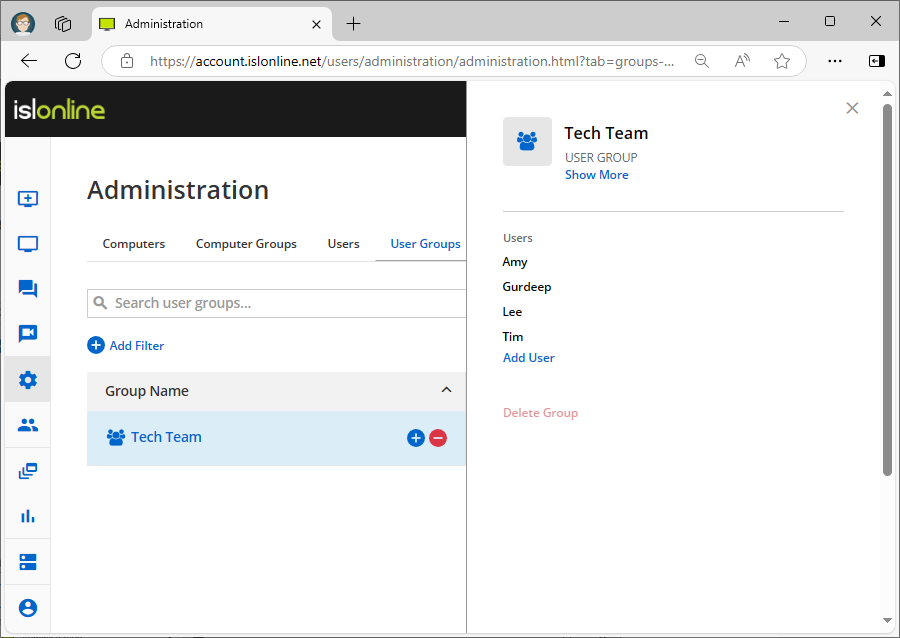
Administration > User Groups
Audit
The Audit page provides an overview of all events happening within the Administration pages. You can filter events by type, such as "user created," and see when they happened, whether they were successful, who initiated the action, and the raw data of the event. Additionally, you can filter results by user, event, timestamp, and more.
Read manual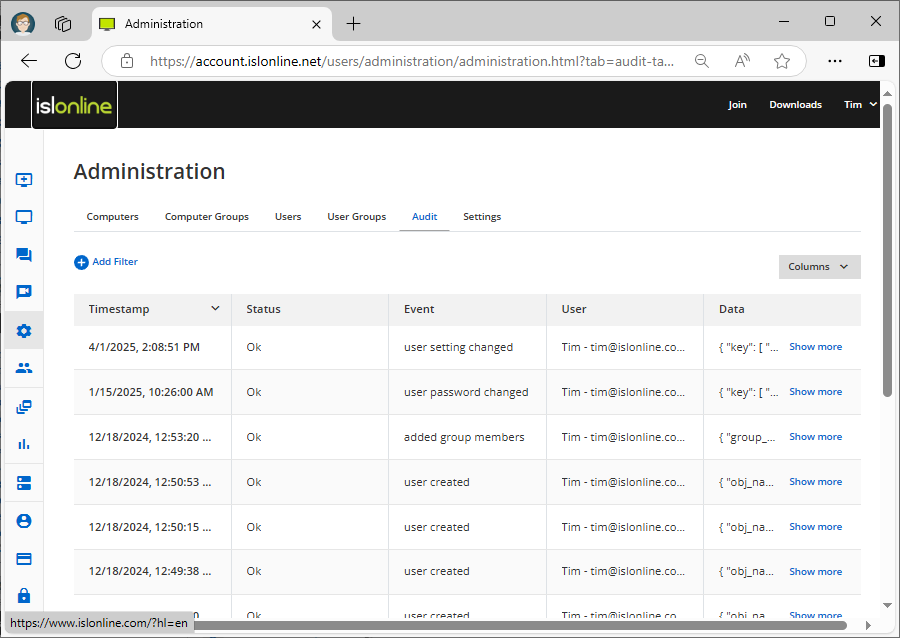
Administration > Audit
Settings
The Settings pages allow you to change domain settings that affect all users. You can manage scheduled access times for computers, require two-factor authentication, set password length and complexity requirements, and more. Note that these settings can also be enabled or disabled at the user level, which can be accessed by going to Administration > Users > User Settings.
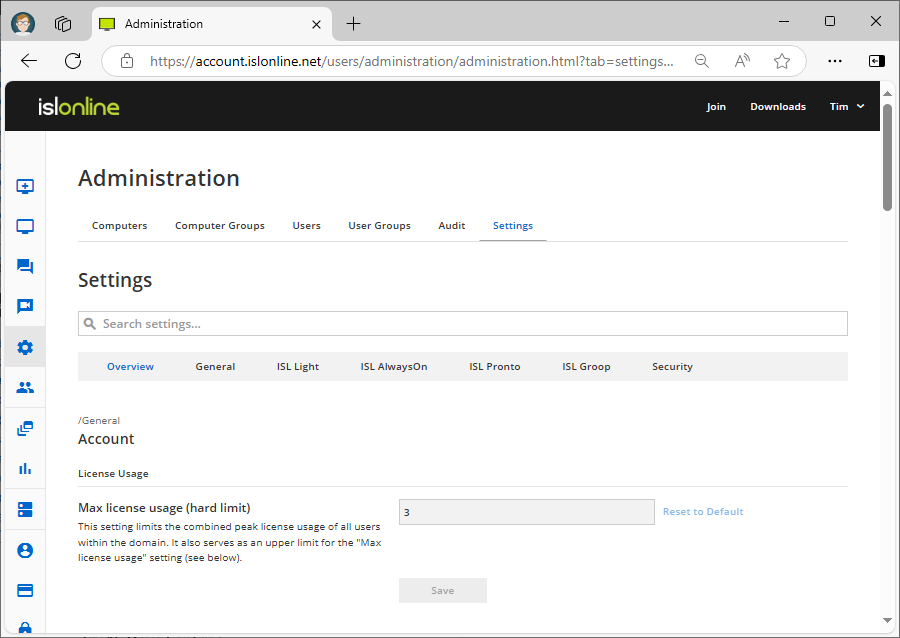
Administration > Settings > Overview
- Enabled
- Disabled (allow override): The setting is disabled but it can be overridden on a lower level
- Disabled (deny override): The setting is disabled and it can NOT be overridden on a lower level
Let's list a few examples of settings
Domain Admin
Enabling this allows access to the Administration pages. It is recommended to only enable this setting on the user level.
Max licence usage
This setting limits the number of licenses available to a user.
Scheduled sessions (in UTC)
This setting specifies the days of the week and times when the user is allowed to start a session. Sessions outside of the schedule will be rejected.
Skip login authentication (guest operator)
When this setting is enabled, operators are allowed to invite guest operators (without a user account) into their ISL Light sessions.
Login without configured Two-Factor Authentication
Disabling this option will force Two-Factor Authentication for the user(s). Users will be required to configure Two-Factor Authentication on their next login attempt if they do not have at least one Two-Factor Authentication method set.
Read manual